SmartLink Setup Guide
Background information
SmartLink is a Service from FlexRadio. SmartLink allows to connect to your FlexRadio from outside your home Network (or from outside the location of your Radio). If you are at the same location where your Radio is located, SmartLink is not needed and can even not be used so SmartLink is only required if you like to connect to your Radio from outside your Home (or location of your Radio).
SmartLink doesn’t require additional Hardware. It just needs to be setup once.
Typical Installation
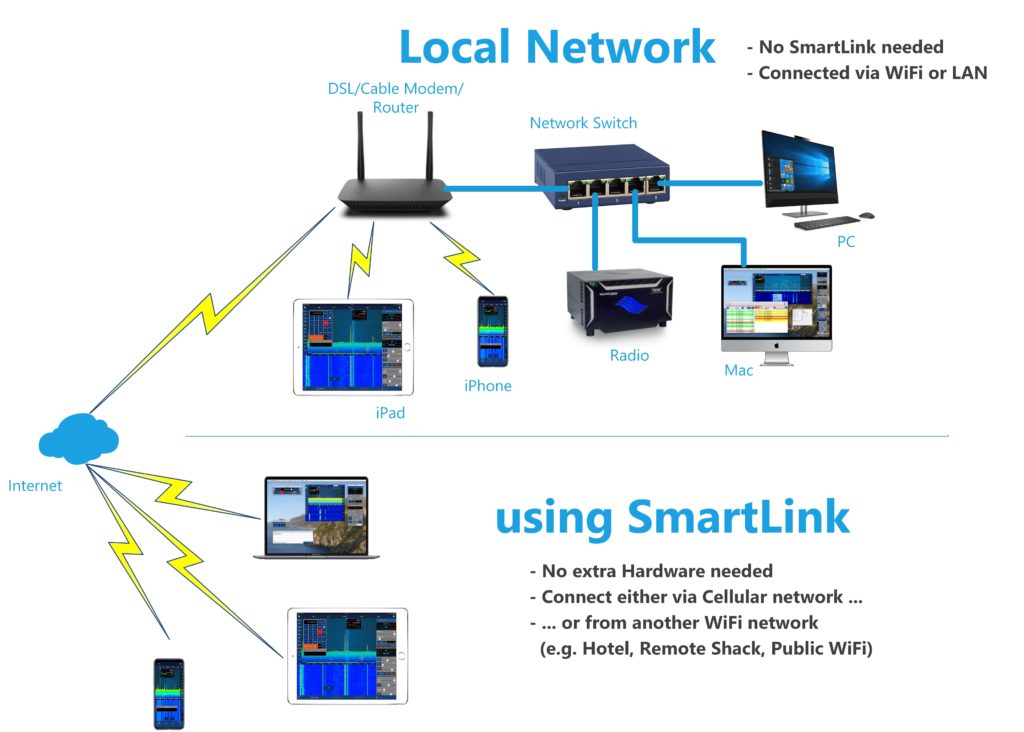
This diagram shows a typical installation. The Radio is connected to the router using a Network Switch and the switch is connected to the router. The Radio could alternatively also be connected directly to the router but not to a Computer. Other devices like Computers, iPhone and iPad can be connected via LAN cable of Wifi.
For using SmartLink (the lower part of the Diagram), no extra Hardware is needed. All Devices can either directly use the Cellular network or any another WiFi network.
Setting up SmartLink
Before you start setting up SmartLink, please ensure the following:
- Your Radio must be connected to your router or a Network Switch which is connected to your router. The Radio must not be connected to your PC or Mac.
- Don’t use any Range extender or WiFi-Mesh for the Radio connection.
- Your router needs to have access to the Internet
- Power cycle your Radio before starting the following setup procedure
- Ensure you have a Microphone with PTT connected directly to your Radio
- The following procedure needs to be performed from where your Radio is located. You need physical access to your Radio
- Setting up SmartLink requires to access your routers configuration website which is protected by a password. You need to have the credentials available and need to know how to access your routers configuration website.
- You either need a Windows PC running SmartSDR for Windows or a Mac, running SmartSDR for Mac to setup SmartLink.
The following chapter explains how to setup SmartLink using SmartSDR for Windows on a PC.
If you are using a Mac, the procedure is a bit simpler and is already explained in the Manual for the App. You can open the Manual from the Help menu or using this link.
Step 1 – SmartLink account registration
Start SmartSDR for Windows and click on “Log In”
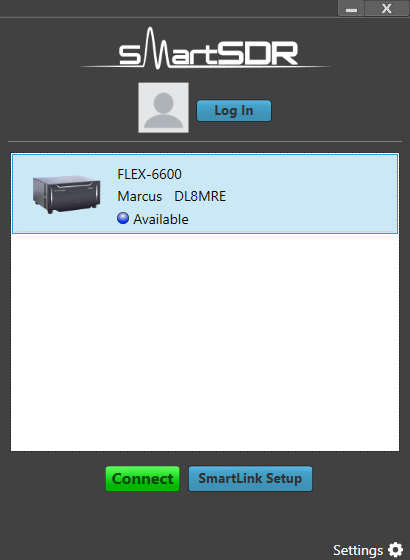
Note: if SmartSDR directly starts in the Panadapter instead of showing this screen, select Settings -> Choose Radio / SmartLink Setup and confirm that you want to disconnect. Now you should see this screen.
Note: If you don’t see the Log In button at the top, you have already crated an account. In this case, click on the account name or the Icon at the top. You will see the account settings. Now click on logout and you should see the same screen as above with the “Log In” button.
Hitting the “Log In” button will show the SmartLink Login and Sign up screen.
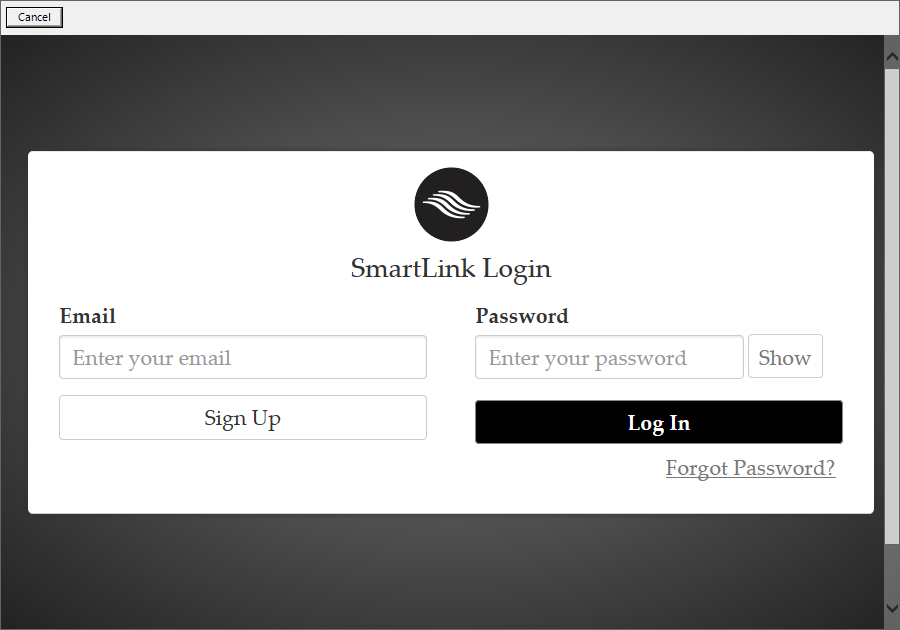
If you already have a SmartLink account, just enter the Email Address and password, click on “Log In” and continue with Step 3.
If you don’t yet have an account, enter an Email address and a new password and hit the Sign Up button.
Note: Don’t use an already existing password and keep this password safe as it will be your SmartLink account password.
Step 2 – Account verification
In case of a new Sign up, now check the mail inbox of the Email address you have entered for SmartLink and look for a mail with the subject “Verify your email”.
Open this mail and Click on the included “Verify your Account” link or button.
Next you should see something like this:
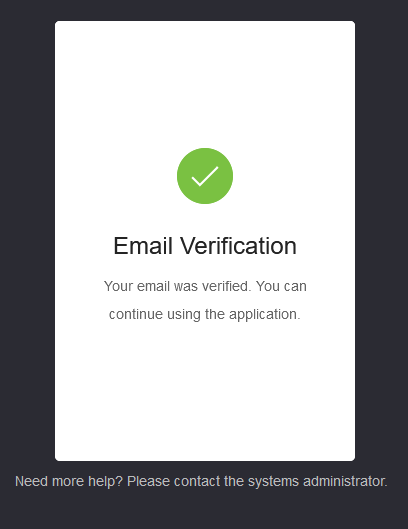
Now, your SmartLink account is ready to use for registering your Radio.
Step 3 – Radio Registration
Back on the SmartSDR Radio chooser screen which will now show your account information at the top.
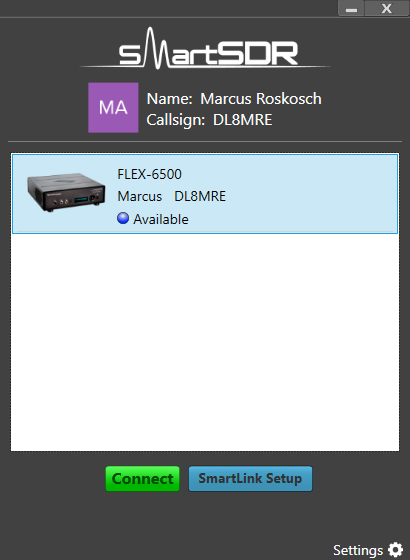
Now click on “SmartLink Setup”
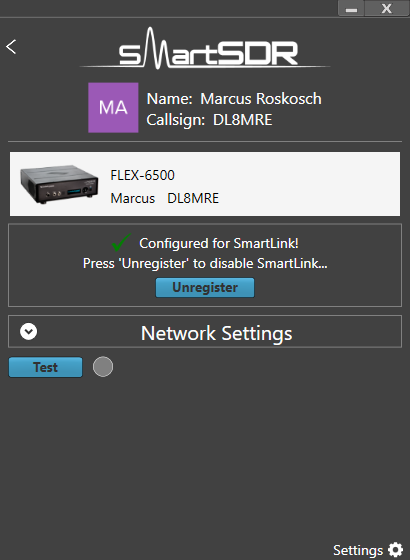
If your account is already registered as shown above, click on “Unregister”.
To complete unregistering you need to press the PTT Button of the Microphone on your Radio.
After successful unregistering you should see a message “! Not configured for SmartLink”.
Now close SmartSDR for Windows and start it again.
Click again on SmartLink Setup.
Click on “Register“.
Now you have to press the PTT button again.
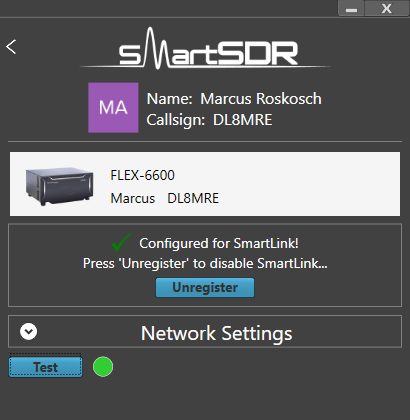
You should now see the same screen as above which tells you that SmartLink is registered.
Next click on the small button on the left side of “Network Settings”.
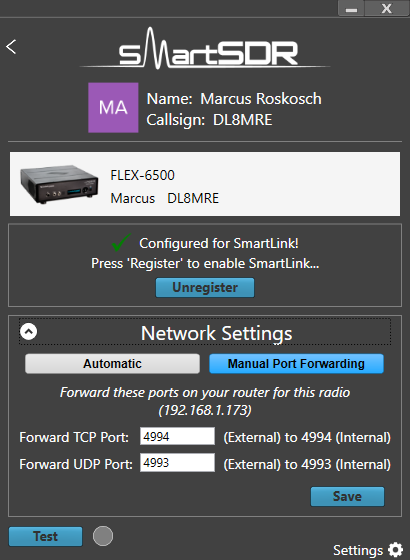
Select “Manual Port Forwarding”.
Enter 4994 in the first field (for the TCP Port forwarding).
Enter 4993 in the second field (for the UDP Port forwarding).
Click on Save.
Note: FlexRadio recommends using “Automatic” but from experience, this Automatic mode turned out to be very unreliable and will usually fail often at a later time. So it is recommended to use the manual Port Forwarding instead.
Note: If you have more than one FlexRadio, you can’t use the same ports for each Radio. Instead you need to use different port numbers (e.g. 4996 for TCP and 4995 for UDP etc.) and the same port numbers need to be added to the Router configuration as explained in the next step.
Step 4 – Router Configuration
This is the most difficult part and depends on the Internet Router you are using.
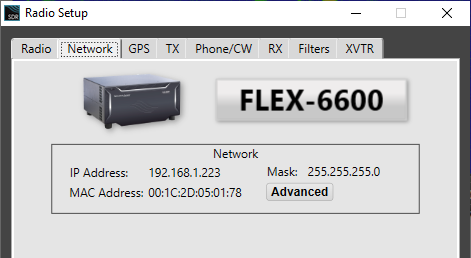
First you need to find out the IP Address of your Radio. For this, you can close and Start SmartSDR again and select “Settings” and “Radio setup…” from the Menu. On the Radio Setup screen select the “Network” tab.
Now you need to open the configuration website of your Router.
What you need to do here is in general:
To open port 4994 from outside to the same port 4994 to the inside to the IP Address of your Radio for the TCP Protocol
and
To open port 4993 from outside to the same port 4993 to the inside to the IP Address of your Radio for the UDP Protocol
So for the following, please note that there are two different ports for two different Protocols (TCP and UDP).
You now need to locate the configuration page of your Router where you can enter these two changes.
Such a configuration screen could look like this:
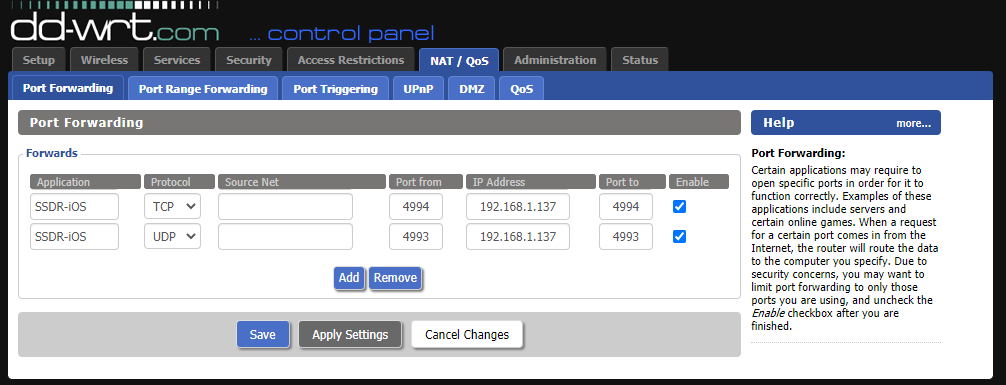
But it could also look like this:
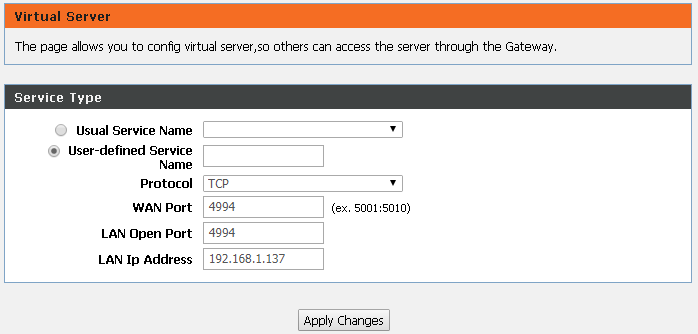
The IP Address entered here must be the IP Address of your Radio.
Most routers allow to enter different port numbers for inside and outside but the port numbers need to be the same for inside and outside.
Some routers allow to setup portforward for both protocols (TCP and UDP) at the same time. However, it is suggested to set them up separately.
Some routers may use different terms for “portforward”.
Finally, look for router settings which will keep your Radio IP Address the same, otherwise your Radio may get a different IP Address in the future and the portforwarding no longer works. This feature of your router may also be called fixed-ip or something like “static leases” in case of the DD-WRT router or “Always assign the same IP address to this device”.
Step 5 – Testing
Once that’s done, go back to SmartSDR and use the “Test” button and see if the status is green.
Step 6 – Using SmartLink with SmartSDR for iOS
Start the iOS App.
Ensure that you are not using WiFi or on the same network where your Radio is.
Explanation: SmartLink Will not work when you would be able to use a direct connection. It can only work if you are either on Cellular network or at a different location / WiFi.
Go to Settings.
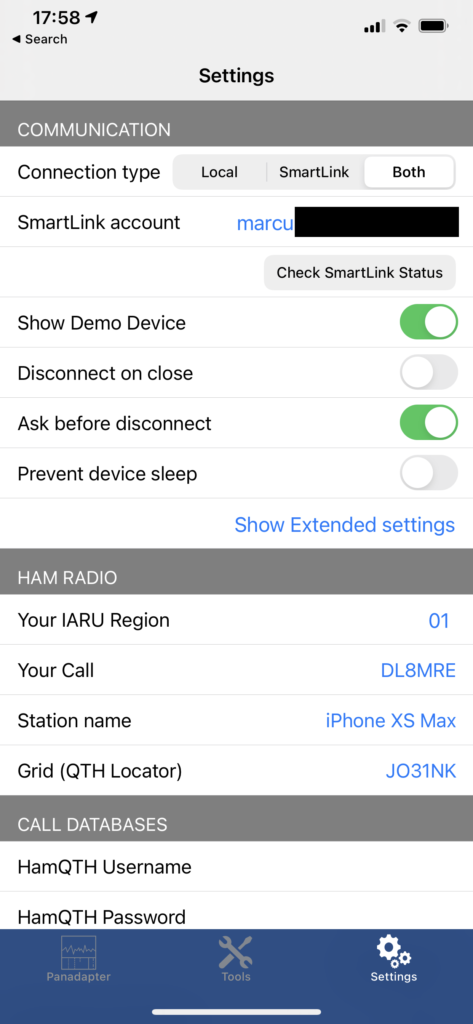
Select “Both” for connection type.
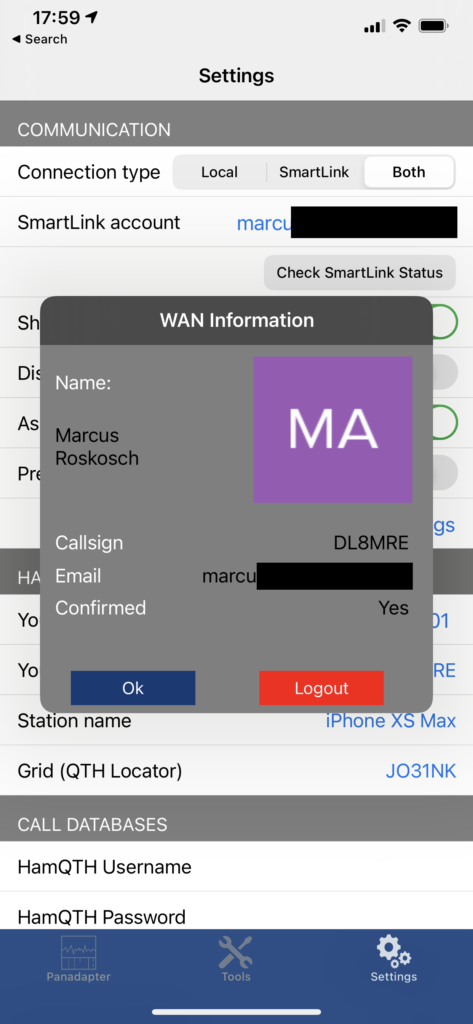
Tap on “Check SmartLink Status”.
Now you may need to enter your SmartLink account credentials.
It should show a “WAN Information” screen and “Confirmed: Yes”.
Now tap on the Panadapter tab.
Tap on the screen to connect.
You should see your Radio in the Radio Chooser with a blue “SmartLink” sign.
Note: If you see your Radio without the SmartLink sign in addition, you can stop here because you are still connected to the same network where your Radio is connected and in this case, SmartLink will not work
Tap on the Radio in the Radio Chooser and you should be connected and see the Panadapter. Now you can use your Radio as if you would have connected to it from inside your home network.
If you don’t see the Panadapter, proceed as follows:
Tap again on the Panadapter to see the Radio Chooser.
Instead of tapping on the Radio, now tap on the (i) Icon right of the name.
Scroll down this list to the very end.
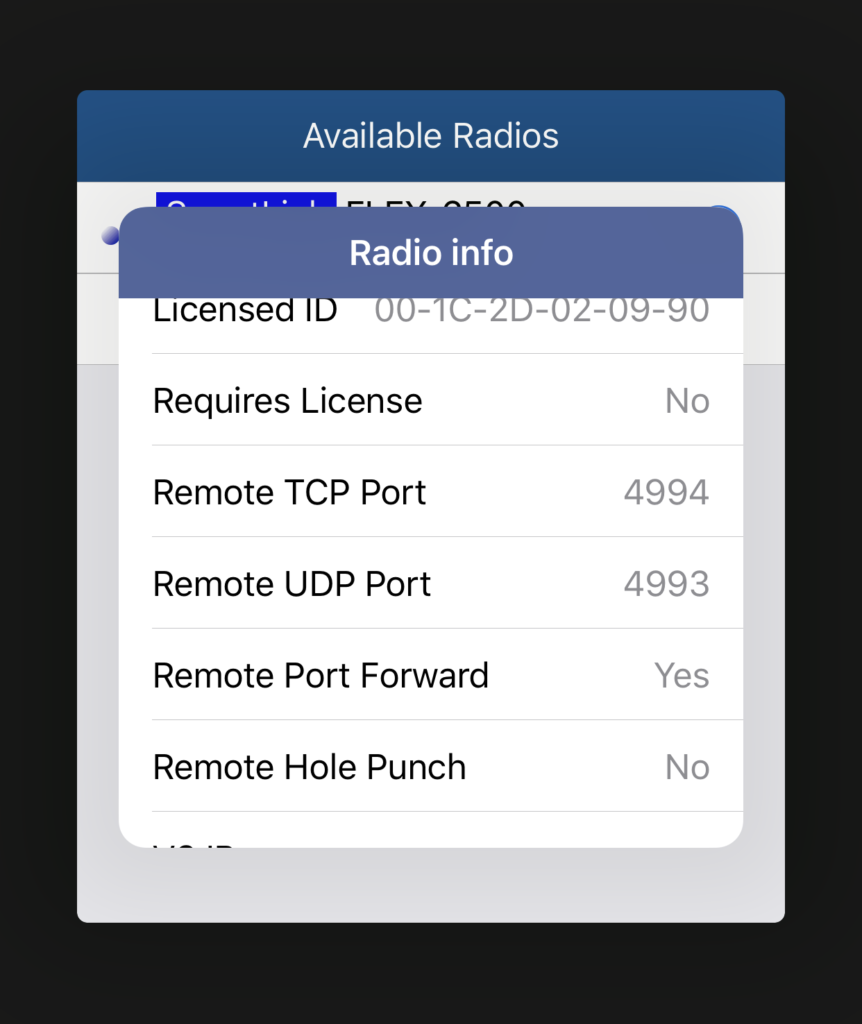
You should see two lines called “Remote TCP Port” and “Remote UDP Port”.
The Values need to be identical to the values you entered for the SmartLink registration and for the router port forwarding. If they are different, repeat the steps again with the correct ports.
If they are -1, SmartLink or the router port-forwarding is not working. In this case, please revisit the previous steps.